

Soy candle making at home is a really fun way to get creative, make gifts, or even start a small business without a big up-front investment. I like soy wax because it burns cleaner than paraffin, lasts longer, and holds scent pretty well. If you’re just getting started, all you really need are a few basic supplies, some patience, and a few helpful tips to guide you through your first batches. Here’s everything I’ve learned about making soy candles at home so far.
What You Need To Make Soy Candles At Home
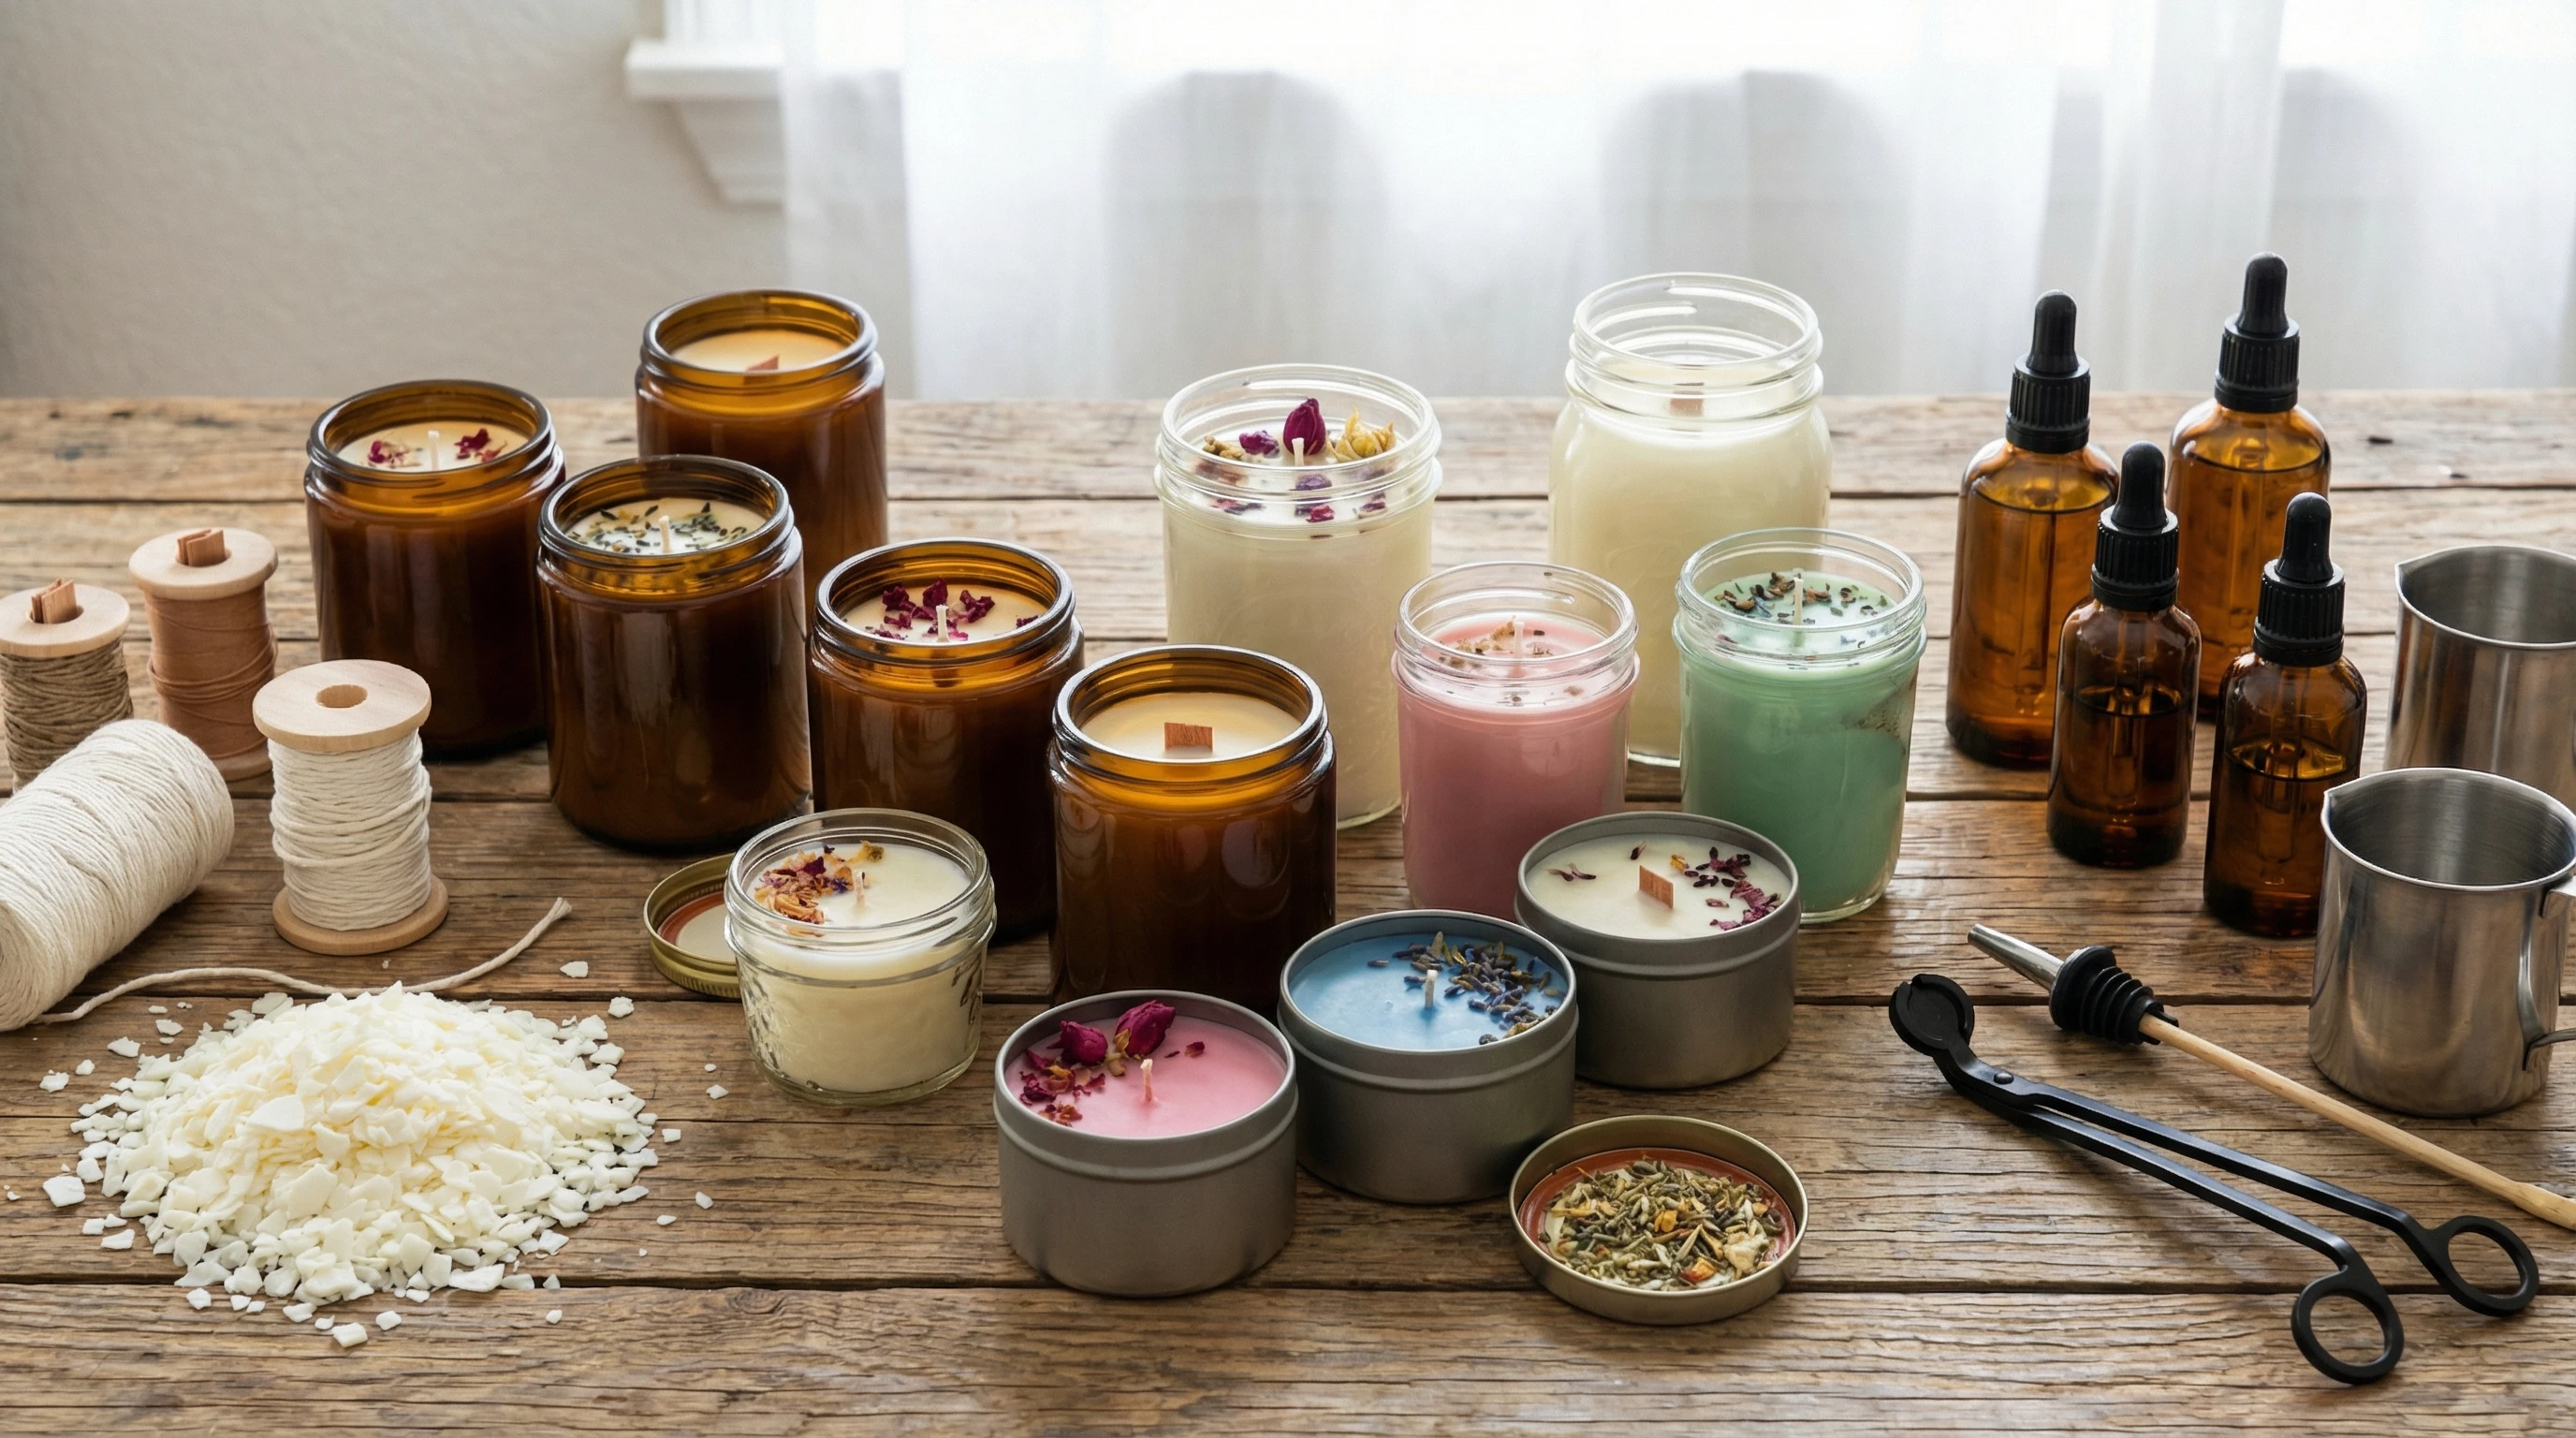
The cool thing about making soy candles is most of the supplies are easy to track down online or at a craft store. Here’s a quick list of basics you’ll want:
- Soy wax flakes: Go for a quality, natural soy wax. It melts cleanly and is easy to work with.
- Wicks: I recommend cotton or wood wicks. Make sure you pick a wick size that matches your container width.
- Containers: Mason jars, old teacups, or simple candle tins work great.
- Fragrance oils or essential oils: For scented candles, just be sure the oils are safe for candle use.
- Double boiler or microwavesafe pitcher: For safely melting your wax.
- Thermometer: This is really important for hitting the right wax and fragrance temperatures.
- Stirring stick or spoon
- Wick centering devices or chopsticks: Optional but makes it easy to keep your wick in place while wax cools.

This Mini Guide Include 2 EASY recipies For Beginners!
There are candlemaking kits with most of these included, making things easier for beginners. You might also want some gloves and paper towels for cleanup if you’re worried about spills. When picking containers, always make sure they’re heat-safe and won’t crack with warm wax.
How to Make Soy Wax Candles
Once you’ve gathered your gear and ingredients, you’ll find the candle making process easier with just a bit of practice. Here’s my step-by-step soy wax candle making guide for home crafters:
Soy Wax Candle Making Instructions
- Measure out your soy wax flakes. A kitchen scale really helps keep things consistent. One kilogram of soy wax typically makes about four mediumsized candles (around 200g each), but you can scale up or down as needed.
- Melt the wax. I use a double boiler for slow, even melting. If you use a microwavesafe pitcher, heat the wax in short bursts and stir often. You’re aiming for a temperature of about 76-82°C (170-180°F) before taking off the heat. NOTE: using microwaves is NOT recommended.
- Prepare your containers and secure the wicks. Use a dab of the melted wax or a wick sticker to stick your wick at the bottom center of each jar. Make sure it stands upright in the center for best results.
- Let the wax cool to the fragrance temperature. For soy wax, this is usually close to 65-70°C (149-158°F). If you add fragrance when the wax is too hot, the scent may fade fast.
- Add your fragrance or essential oils. Stir gently for about a minute for even distribution. For robust scent, use around 6-10% fragrance load by weight; check your manufacturer’s recommendations. Essential oils smell more subtle, but can still be great. But Essential oils is NOT recommended.
- Pour the wax into your containers. Go slow to avoid air bubbles, leaving a little space at the top. Keep your wick centered with a wick holder or a chopstick laid across the jar top.
- Let the candles cool undisturbed. Most soy candles need about 24 hours to fully set before burning. Trim your wick to about 5mm (1/4 inch) before use. For Soy waxes its recommend to let coolf foor at least 5 days before you lit the candle.
With each batch, you’ll get a feel for what ratios and containers you like best.
How to Get a Strong Scent Throw in Soy Candles
Want to get candles that fill the room with fragrance? Here are a few tips that work for me every time:
- Use the right fragrance load: Aim for 6-10% fragrance oil by weight. Don’t exceed what your wax can hold, or the excess oil will seep out.
- Add fragrance at the right temperature: For soy wax, you want 65-70°C (149-158°F). This gives a good blend without losing strength to evaporation.
- Mix thoroughly: Stir for at least a minute to spread out the scent evenly.
- Test burn: Light one candle from every batch and jot notes about scent strength and burn. Each scent and wax can perform slightly differently, so trial and error helps.
Some essential oils are naturally light, so if you want the strongest throw, stick to fragrance oils made for candle making. They’re tested to give a good scent throw in soy wax blends.
Tips for Making Soy Candles with Essential Oils
It’s definitely possible to make soy candles with essential oils, but the scents tend to be softer and more natural. Things to look for when using essential oils:
- Use pure, high-quality essential oils for best results, and double-check they’re safe for burning.
- Mix together different oils for custom scents (think lavender and eucalyptus or orange and cinnamon).
- Be aware of each oil’s flash point—a lower flash point means volatile oils might evaporate fast if added hot. Usually, 65°C (149°F) is safe, but always research your specific oils.
- You’ll need to use a bit more oil for a noticeable scent, often close to 10% by weight. Even then, expect a lighter aroma compared to fragrance oils.
Natural scents are soothing, but keep your expectations in check. Burning these candles feels calming, though the fragrance is more background than in-your-face.
How To Make Soy Wax (If You’re Curious)
If you’re ever tempted to make your own soy wax, it’s a long process—start with harvesting soybeans, extract the oil, then hydrogenate it so it will harden at room temperature. Most crafters, like me, just buy ready-to-use wax flakes to keep things simple and predictable. Still, tracking down how soy wax is made gives you more appreciation for its clean-burning features and natural base.
Best Temperature For Candle Making (Celsius)
Using the correct temperature helps make smoother, more even candles. Here’s what I’ve found works best:
- Melting soy wax: 76-82°C (170-180°F)
- Pour temperature: 60-70°C (140-158°F)
- Add fragrance: 65-70°C (149-158°F)
Keep a digital thermometer handy to avoid common errors. Pouring at the lower end (closer to 60°C) often makes the surface come out smoother, especially when working in cooler rooms where wax can set up fast.
Is It Cheaper To Make Your Own Soy Candles?
Making soy candles at home is typically less expensive than buying top-shelf ones at the store, especially if you’re reusing containers and buying supplies in bulk. Once you have the up-front tools, your per-candle cost comes down with every batch. If you’re using fancy scents and high-end jars, prices go up, but DIY nearly always beats store prices unless you love something super specific. Don’t forget, your time and a few early mistakes are part of the real investment!
How Many Candles Will 1kg of Soy Wax Make?
One kilogram of soy wax flakes usually yields four medium candles (200-250g each, including wax and any added scent), or you can make eight to ten smaller votives. Container size and how much fragrance you mix in will determine the final count.
What Are The Negatives For Using Soy Wax To Make Candles?
I’m a fan of soy wax, but it’s good to be aware of a few potential drawbacks:
- Softness in heat: In very warm areas, soy candles can droop or sweat some oil.
- Surface frosting: Some batches look cloudy or frosted, especially when cooling fast. This doesn’t hurt performance, but can affect shelf appeal.
- Bigger wick needed: Soy wax sometimes needs a thicker wick for a good burn.
- Sensitivity to pour temps: Pour too hot or too cold, and you might see cracks or sinking on the surface.
Most of these downsides are easy to handle as you practice, but it’s smart to know what you’re getting into before stocking up.
How To Make Soy Candles At Home To Sell
Starting a small business with handmade soy candles is both creative and practical—a lot of people want natural candles these days. Here are my best recommendations:
- Nail down your go-to recipe and keep a log so you can make batches consistently.
- Test lots of scents and jar shapes to see what people want, but stick with a cohesive look and style for branding as you grow.
- Check each batch for scent throw, burn time, and safety. Only use containers that are meant to take heat and wicks sized right for the vessel. Never skip this step!
- Sell on platforms like Etsy or your local markets, and always get feedback from customers—they’ll help you fine-tune your products fast.
- Look up local labeling laws and add a proper warning label to every candle. This protects you and your buyers, building trust along the way.
It’s a friendly way to start a business if you love hands-on crafts and delighting people with scents they’ll love at home.
Frequently Asked Questions
What’s the best way to get a really smooth soy candle surface?
Pour soy wax at a slightly cooler temperature (about 60-63°C or 140-145°F), and let your candles cool away from drafts or fans. If you see a frosted surface, try a different pour temp or let them set under a warm towel for a slower cool-down.
Can you add color to soy candles?
Absolutely. Just use dye chips or liquid dyes made specifically for candles, adding them to fully melted wax before mixing in the fragrance oil. This gives you the most vibrant, even color.
How long should I cure my soy candles?
Let your candles cure for one to two weeks. This waiting period helps the scent fully develop and improves burn quality, especially with larger jars or more potent fragrance loads.
Can I use leftover or recycled jars for candle making?
Yes! Just make sure the jars are squeaky clean, heat-safe, and free from any cracks. Reusing jars keeps things eco-friendly and saves some cash too.
Getting Started
Soy candle making is a hobby that’s both easy to start and open for endless experimentation. You can personalize scents, jars, and accessories, or even build a brand around it. I love having full control over what goes in my candles and the satisfaction of making exactly what I want. After a few tries, you’ll keep improving with every batch. Write down what works so you can repeat your best results. Above all, have fun—and happy candle making as you find your groove and light up your space!