

Candle making is one of those hobbies that feels both relaxing and productive. Whether you want to fill your home with custom scents or try selling your creations, you don’t need a ton of fancy gear to get started. I’ve spent plenty of time experimenting in my own kitchen, and it’s honestly amazing how straightforward it is once you know the basics. From picking your supplies to adding that rich fragrance, everything can be tweaked for your personal touch.
The Basic Supplies and Ingredients You’ll Need
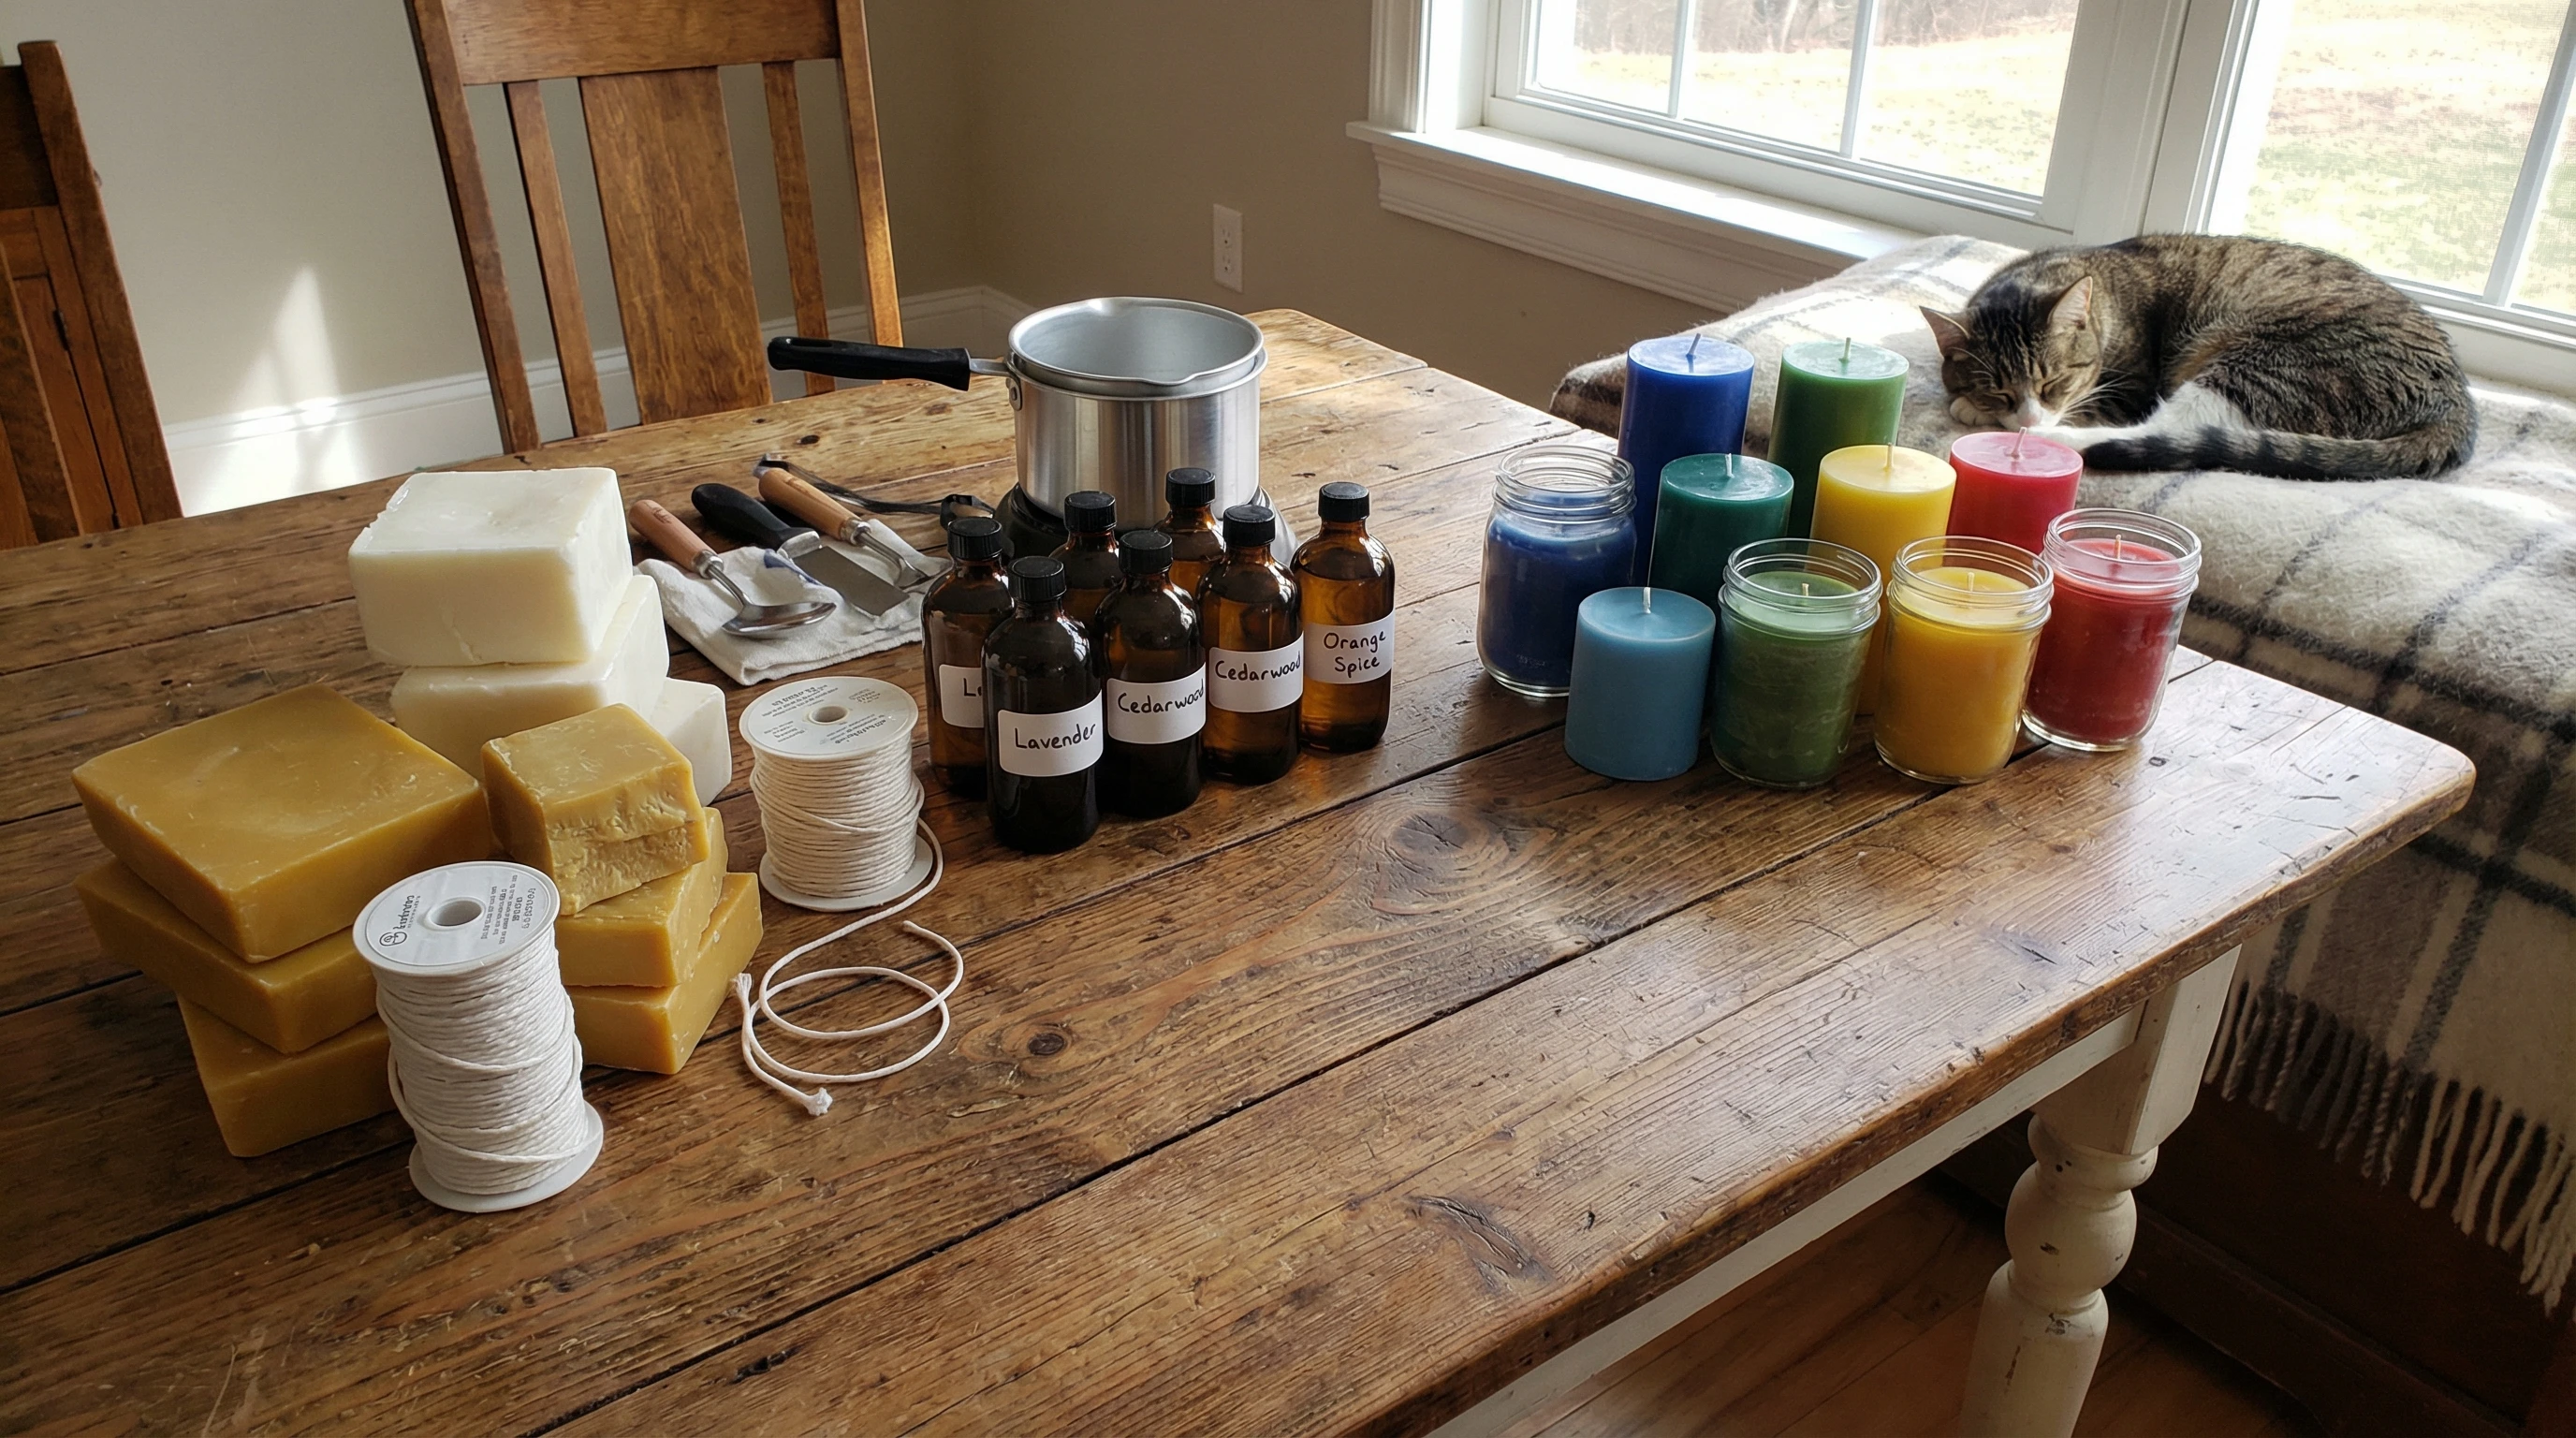
If you’re new to candle making, browsing the supply aisle gets confusing fast. Here’s what I grab when I’m planning a batch:
- Wax: The main ingredient. I usually start with soy wax because it’s easy to melt and burns clean, but beeswax, paraffin, and coconut wax are all popular too.
- Wicks: Cotton wicks work well for most candles, and choosing the right size for your container is really important.
- Containers or molds: Mason jars, metal tins, teacups, or silicone molds all work. Just make sure they’re heat safe.
- Fragrance oils or essential oils: The fun part. I love experimenting with seasonal scents, but if you want really strong-smelling candles, look for “fragrance load friendly” oils and check the suggested maximum usage on the label.
- Dye chips or liquid candle dye (optional): These add color. A little goes a long way, and I always start with a small amount to avoid accidentally making the wax too dark.
- Pouring pitcher (metal is best): Makes handling melted wax way safer.
- Heat source: Double boilers or slow cookers both work fine. A microwave works for small batches, just keep a close eye on things.
- Optional extras: Wick stickers or glue dots (hold the wick in place), thermometer, and popsicle sticks or chopsticks to keep the wick centered.
Once you have your supplies, things fall into place quickly. The best part? None of this stuff is super expensive, and most items can be used over and over again. You’ll often find that reusing pouring pitchers, thermometers, and even some molds can help keep costs down, letting you focus on experimenting with scents and oils instead of buying new tools every time.
How to Start Making Candles at Home
The process itself is easier than you might think. My first batch came out way better than expected just by following these simple steps:
- Set up your containers: Clean and dry your jars or molds. Stick or glue the wick to the bottom and use a stick to keep it upright and centered.
- Melt the wax: Place the wax flakes in your pouring pitcher and melt them using your double boiler setup. Stir gently until everything’s liquid and smooth, being careful to keep the temperature below 185°F (85°C) for soy wax so it doesn’t scorch.
- Add fragrance and color: Once the wax cools a bit (usually around 160°F or 70°C), add your fragrance oil and dye. Stir for at least two minutes for even mixing, since this helps avoid weird separation.
- Pour into the containers: Pour the wax slowly to avoid bubbles. Keep the wick centered and straight while pouring. Try pouring near the center first, then slowly fill out the sides for smoother tops.
- Let them cool: Leave candles at room temperature until fully set, which usually takes a few hours. Trim the wicks to about ¼ inch before lighting to prevent too much smoke.
If you ever see craters or sinkholes in the center, don’t stress. Topping off with a bit of melted wax usually fixes it. You might also try poking a tiny hole near the wick before topping up, to let air bubbles escape. Most candles are ready to burn after a day or two, but letting them cure for about a week helps scents develop even better. This curing period is especially important for stronger-scented candles—your patience will absolutely pay off later.
Common Candle Making Questions Answered
How do you start making candles for beginners?
Pick up a basic candle making kit or grab a small batch of supplies and follow the steps above. Try simple soy wax container candles at first, since they’re forgiving and show results fast. Start with unscented or lightly scented to practice your pour and test wick sizes. Once you’ve nailed the basics, playing with scents and colors gets pretty addictive and opens up lots of creative options. Over time, you can try different containers, more complex scent combinations, and even blend wax types for a custom-feeling candle.
What ingredients do I need to make homemade candles?
The four main things are wax, wicks, a container or mold, and optional scent or color. Most people use soy or beeswax, cotton wicks, glass jars or tins, and fragrance oils. Dye is completely optional, but adding just a touch can help set the mood or match your home’s vibe.
Is candle making a profitable hobby?
Candle making can totally turn into a fun little business. Supplies are pretty affordable, and people always want unique or personalized candles for gifts or home decor. A lot of small businesses start by selling to friends or at local craft fairs, and eventually, some grow into online shops. It’s a satisfying way to earn some side income and flex your creative muscles at the same time. Crafting unique scents, offering personalized jars, or theming your candles seasonally can set your products apart and build a loyal customer base. Plus, word-of-mouth from friends and social media posts really helps spread the word about your candles.
How to correctly start a candle production?
For anyone thinking about scaling up: start small and focus on consistency. Test different waxes, wicks, and scents until you’re happy with the results. Track your batch recipes and test burn every new formula before selling. Clean workspaces, accurate measuring, and reliable suppliers help establish a smooth workflow. As you get more confident, batching bigger pours at once, investing in larger molds or containers, and even designing simple branding for packaging can help. Starting with a solid plan helps avoid a lot of messes and headaches later. Don’t be afraid to ask for feedback from early customers, and adapt your process when you find ways to make your operation faster or more efficient.
What makes candles smell the strongest?
For a really strong scent, look for high-quality fragrance oils that are specifically for candles. The key term to watch for is “maximum fragrance load,” which is the safest and most effective amount you can add to your wax. I also make sure to stir the fragrance oil in at the right temperature, usually a bit cooler than the wax’s melting point. Every wax has its own sweet spot, so checking the instructions from the supplier makes a huge difference. Letting the candles cure for several days improves scent throw and burns, giving you a bolder fragrance that fills the room.
Moving From Hobby To Side Hustle
What I love about candle making is how easy it is to go from creating for fun to selling your own products. Here’s what I found most helpful when I started thinking about selling my candles:
- Focus on a niche: Maybe you like woodsy scents, petfriendly blends, or decorative wax melts. Finding your vibe makes your products easier to market—and lets you build a brand that stands out.
- Test and Document Everything: Keep notes on every batch, including wax type, fragrance percentage, wick size, and color. Consistency helps you stand out and keeps customers coming back, especially when they fall in love with a specific scent or look.
- Start small, sell local: Give samples to friends or try a table at a local market. You’ll get feedback and see what people like without needing a fullblown business. This approach gives you a chance to figure out what works best before moving online or scaling up.
- Pricing: Figure in the cost of supplies, your time, and any packaging or shipping if you move online. Don’t forget to check what similar handmade candles are selling for in your area or on marketplaces.
A lot of people miss how helpful having a small website can be. Even just a simple page showing off your candles, prices, and contact info helps you look way more legit. If you’re like me and not a web design enthusiast, I’d recommend trying an easy website builder platform. If you want to learn more about creating a site and building your hobby into a real online business, Wealthy Affiliate has some handy tools and beginnerfriendly lessons. I played around with their platform and was surprised by how quickly I had a little candle site up and running. It’s worth checking out if you’re curious about turning your candles into something more than just gifts for friends. Promoting your products online, learning simple social media strategies, and even running small ads can help get the word out to more potential buyers.
Troubleshooting Common Candle Problems
Even with the best planning, some candles just act up. Here’s what I usually tweak when something goes wrong:
- Weak scent: Check the max fragrance load for your wax and try adding scent at a slightly warmer temperature to help it bind to the wax. If this still doesn’t work, it could be time to try a different fragrance oil, or consider letting your candles cure for a full week.
- Uneven burn or tunneling: Wick size usually needs adjusting. Too small and the wax will tunnel, too big and it will smoke or burn too fast. Testing a few different wick sizes in similar jars can make a world of difference, especially if you use thick or oddlyshaped containers.
- Frosting (white spots on soy candles): This doesn’t affect the burn, but if it bugs you, cool your candles slowly and store them at room temperature. Some candle makers wrap their containers in towels to help the cooling process go slowly and evenly.
- Sinking around the wick: Top off the candle with a little melted wax to even things out. You can also give your poured wax a gentle tap on the counter to release bubbles before it sets.
Most candle making challenges are easy to fix with a bit of experimenting and keeping good notes along the way. Remember to write down what didn’t work, too—that way, next time you can skip the trouble and zero in on reliable methods.
Advanced Candle Making Tips for Better Results
Once you’re confident with the basics, there’s a lot of room to experiment. Here are some tweaks that really bumped up my candle game:
- Layered candles: Let each colored or scented layer cool before pouring the next; this looks eye-catching and lets you play with scent mixing for a subtle gradient effect.
- Unique molds: Silicone baking molds, vintage teacups, or even seashells can make your candles stand out and make awesome gifts or decorative pieces for friends and family.
- Custom labels and packaging: Simple tags, handstamped bags, or custom printed stickers give candles a professional look. Creative packaging can give a big boost to your presentation, helping your products stand out both in person and online.
- Repurpose old candles: Melt down leftovers from storebought candles or your own “fails”; just be careful about mixing unknown wax types. If you’re using old candles, filter out spent wick bits or debris to get the cleanest burn possible in your new creation.
Batch testing, creative decorating, and paying attention to customer favorites will help you keep growing whether you stick to gifting or start making sales. Candle making is easy to try, affordable to repeat, and always leaves your kitchen smelling fantastic. If you’re feeling inspired to do more with your hobby, building a website or joining a supportive online community is a pretty smart move. Don’t hesitate to track down new scent blends, get feedback from others, or share your finished candles on social media for extra ideas and inspiration. There’s always something new to try in the world of candles—just keep experimenting and enjoy the ride.